 In our new article, we want to talk about such a fairly simple, but very useful tool as a marking cord. It will help you a lot when you need to mark even straight lines on a flat surface, for example, cutting lines for sheet materials or levels for the future location of the partition. To do this with a marking cord is much faster than, for example, using an ordinary pencil and a metal meter for this, especially if the distance is more than 2 - 3 meters.
Marking cord design
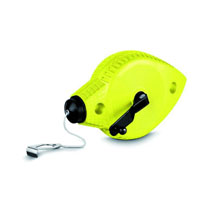
By its design, the marking cord is quite simple. This is usually a cotton thread of several fibers 0.5 mm thick, which is wound on a special drum inside a plastic box. The thread comes out through the hole. Together with the thread, a special colored chalk powder is poured into the box,
which colors the thread itself. There is a folding handle for twisting the thread, and a separate hole for filling the powder, which is closed with a sealed plug.
Using a chalk line
When marking, we unwind the thread of the marking cord with the chalk powder on it. We apply the cord to the marked marks and pull it well (like a string). This operation can only be performed by two people. After that, pinching first with
pull the cord from the surface at one end and release. The stretched cord strikes the surface, on which a mark is imprinted, which is an exact straight line. We do the same on the other side, since the farther from the place where the cord was raised, the less visible the trace left on the surface.
Features of marking cords and coloring powder
First, let's talk about powders. In hardware stores, you can find powders of various colors, although they have the same composition. The color most common is red, although blue, black and white powders can also be found. It depends on what color of the surface you need to mark. It is also worth noting that the powders are also resistant to wind and moisture. Some are permanent and some are easy to wipe off with the palm of your hand.
Powder must be poured into the cord body in the right volume - approximately 3/4. At the same time, if you pour the powder into a new cord, we recommend that you first unwind it and pour the powder into half the volume, then wind the cord, and then add the powder. During operation, we also add powder, respectively, so that the lines remain clear.
The cords themselves differ in the thickness of the thread. The cheapest models have very thin cords of three strands 0.5 mm thick. They are easy to tear during inaccurate use. Also, the line from such a cord will be poorly visible on the surface, because the thicker the cord, the better the line. We would not recommend such models at all for personal, let alone professional use.
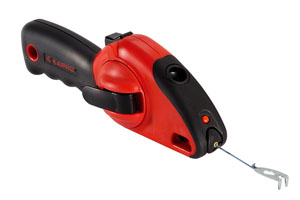
Models of marking cords also differ significantly in the design of the gearbox (the drum on which the cord is wound) and its multiplicity. Ordinary non-professional models have a simple drum and winding the cord takes a long time. If we talk about professional models, then the gearboxes in them have a multiplicity (the cord at the same handle speed is wound 2 or more times faster).
If you often use the cord, then the time savings are quite large. On some sophisticated models, you can find a bubble level and a device for self-twisting the thread.
Other hand measuring tools
|
Useful articles |