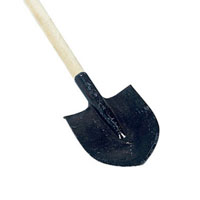
 Despite the rather simple design, during the operation of a bayonet shovel, it can fail. This may occur due to non-compliance with the requirements for the load on the tool, for example, when developing excessively hard soils, or performing work unusual for a shovel. We list the main damage to the bayonet shovel, which can be repaired with your own hands, the causes of these damages, as well as the repair technology for this tool.
1. Damage to the wooden part (handle) of the shovel.
Such damage can occur when digging very hard soil, such as dried clay. Having stuck a shovel into the ground and trying to lift it with the ground, the handle may not withstand and crack or even break.
In this case, most likely you will have to replace the stalk. Using pliers, a screwdriver or wire cutters, we take out the fasteners of the handle (the type of tool used depends on how the metal part is fixed - with a nail or a self-tapping screw). Next, take out the broken part of the handle. If the part remains in the shovel, it can be knocked out with a hammer and a metal pin. As a pin, you can use a piece of reinforcement, a thick screwdriver, and even a piece of a stick or rail a little thinner than a shovel handle.
Using a knife or planer, we sharpen a new handle and hammer it into the metal part. At the same time, he should go into it tightly. It may be necessary to slightly cut the undercut part at an acute angle so that the protruding part of the handle does not rest during work. After that, we fix the metal part to the handle.
This can be done with nails or screws. In the first case, it is necessary to take a thick nail with a section slightly smaller than the diameter of the mounting hole. After that, we cut it off with a grinder, file or hacksaw so that the nail with the hat becomes 1 - 1.5 cm shorter than the diameter of the handle. Next, we hammer it into the hole. If you decide to stay on a self-tapping screw, then we note that it holds dynamic loads much better.
As a self-tapping screw, it is necessary to select a thick version that is suitable for the diameter of the hole for fasteners, as well as 1 - 1.5 cm shorter than the diameter of the handle. A roofing screw with a hex head is perfect for this purpose.
2. Crack in the metal part.
Due to heavy loads in the metal part, a crack may occur at the junction of the flat part and the fastening part. Such a defect can be partially eliminated using conventional electric welding.
We remove the metal part from the handle and clean the gap or crack from rust. Next, we weld the crack along the entire length, if necessary, aligning the broken parts as close as possible. The metal on the shovel is thick enough, so a 3 mm thick electrode will be just right. After that, with the help of a grinder, we clean the seam. It remains only to re-plant the shovel on the handle and you can use it. Of course, the shovel will not have the initial strength, however, it is easily suitable for loose and loose soils. The only requirement for such a repair is that the metal part must be made of steel.
3. Deterioration of the cutting properties of the shovel.
Over time, the shovel begins to become dull - meaning the cutting edge. As a result, more and more effort is required to drive the shovel into the ground. This is fairly easy to remove with a grinder.
We sharpen the blade like a regular table knife on both sides and the shovel again begins to cut the soil like butter. If you do not have an electric sharpener, you can do this with a manual whetstone or file, although in this case it will take much more time and effort. The edge must be sharpened to a rounding (vertical edges of the metal part.
|
Useful articles |